Building your first aluminum profile flight sim rig takes an afternoon, three tools, and one good decision made before you order a single extrusion: fix the seat position first, then build everything around it. On my deck, the rig that finally felt right was the one where I sat in the chair, measured where my hands and feet actually fell, and only then cut metal. Get that order wrong and you rebuild.
This is the build walkthrough I’d hand a friend starting from a flexing desk. It’s not a parts list dressed up as a guide — it’s the sequence and the few decisions that matter, in the order you’ll hit them. Aluminum profile dominates this hobby for one reason: it assumes you’ll get something wrong the first time and lets you fix it by loosening four bolts. That forgiveness is the whole point, so build to use it.
Step One: Decide the Seat, Then Measure From It
The seat is the datum — every other dimension on the rig references where your body sits, so it gets decided before anything else. Plant your chosen seat where it’ll live, sit in it as you’d fly, and measure three things: the distance and height to where your feet want the pedals, the distance and height to where your hands want the primary controller, and your eyeline relative to where the screen will go. Those numbers are your build spec.
Skip this and you build a beautiful frame that puts the pedals two inches too far away, and because everything bolts together rigidly, fixing it means partial teardown. I learned this the expensive way: I built the front section before settling the seat, the seat height changed the geometry, and I rebuilt the whole front. Measure from the seat first and the rig fits you on day one instead of week three.
Step Two: Choose Your Profile Sizes
For a first aluminum profile flight sim rig, 2040 extrusion handles almost everything, with 4040 reserved for long monitor uprights and a floor you can stand on. Flight sim loads are gentle — there’s no force-feedback wheel trying to tear the frame apart — so buying the heaviest profile everywhere is money spent on stiffness you’ll never feel. Spend it on brackets instead. If you want the numbers, the load and deflection tables published by extrusion makers like 8020 Inc show a well-braced 2040 span barely deflecting under sim-controller loads — the stiffness lives in the bracketing, not the bar.
Here’s the breakdown I’d order to today, member by member:
| Frame member | Recommended profile | Why |
|---|---|---|
| Lower frame / base | 4040 or 2040 | 4040 if you stand on it climbing in; 2040 to save weight and cost |
| Seat rails | 4040 | Long span carrying your full weight; the one place to over-build |
| Yoke / throttle members | 2040 | Short members, small loads; 2040 is plenty rigid |
| Pedal plate support | 2040 + backing plate | Braced back to the seat frame so the rig absorbs your push |
| Monitor uprights | 4040 | Longest unsupported span; the bit that visibly wobbles if under-built |
Order it cut to length. Cutting your own extrusion square is the only genuinely fiddly part of a profile build, and for a first rig it’s not worth the deburring tool and the miter setup. Pay the small cut fee and skip the one step that can go wrong.
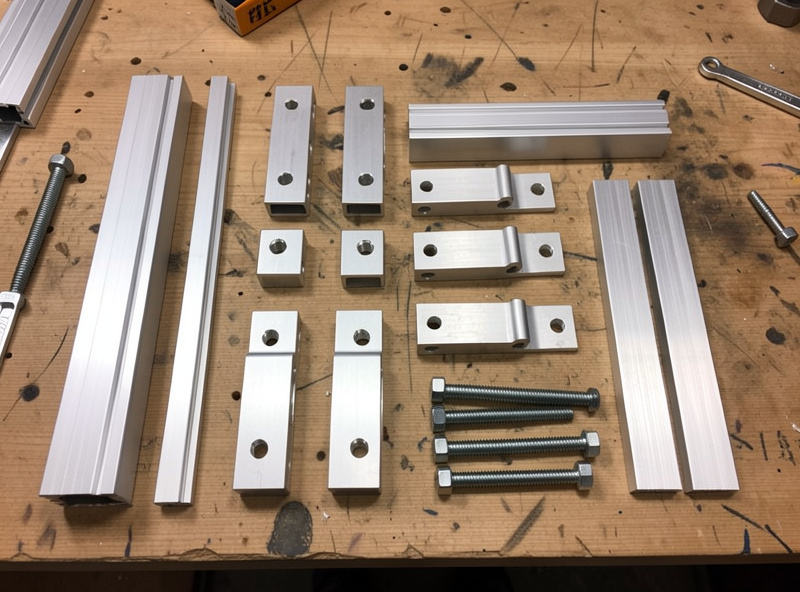
Step Three: Buy More Brackets and T-Nuts Than You Think
Rigidity comes from triangulation and bracket count, not from heavier extrusion — so the brackets are where your stiffness budget goes. A 2040 frame with proper gusset brackets at every joint out-stiffens a 4040 frame held together by two bolts per corner. Order gusset brackets for every structural joint, plain angle brackets for the light ones, and a generous bag of spares.
The t-nut decision is the one nobody warns you about. Slide-in t-nuts have to go in from the open end of an extrusion before you cap it, so they must be planned in advance; drop-in t-nuts can be added anywhere, anytime, which is what makes a profile rig endlessly extensible. Buy mostly drop-in nuts. They cost a little more and they save you the “I forgot to slide a nut in and now I have to disassemble the frame to add a panel” evening that every builder lives through exactly once. A starter run of 2040 extrusion with gusset brackets and drop-in t-nuts is the right shape of first order. As an Amazon Associate I earn from qualifying purchases.
Step Four: Build the Core, Then Hang the Controllers
Assemble the seat-and-frame core first, square it with a builder’s square as you tighten, and only then mount the controllers — because the core is what every controller position references. Loosely assemble the whole core with bolts finger-tight, check it’s square in both planes, then go round and torque everything. Tightening as you go locks in any twist; squaring first and torquing last keeps the frame true.
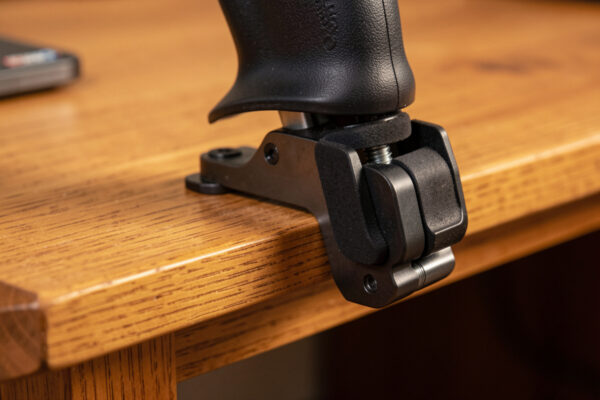
With the core square, mount the controllers on short, well-braced members. The single biggest mounting mistake is a long arm: a yoke on a long unsupported member flexes exactly like it did on the desk, and you’ve gained nothing. Keep mounts short and close to a frame member, add a backing plate behind the yoke, and brace the pedal plate back to the seat frame so your push goes into the structure instead of bending a cantilever. This is the same anti-flex logic from the desk mount flex comparison, just done properly in metal.
Step Five: Monitor Support and Cable Management
The monitor upright is the longest span on the rig and the one most likely to wobble, so it gets 4040 and a brace back to the frame — not a cantilevered arm hanging off a single post. Set the screen so your natural eyeline sits near the horizon; flight sim wants the screen higher than desktop ergonomics suggest, and getting it right is its own topic in the monitor mounting heights guide. Build the upright to put the panel there and brace it so a keyboard bump doesn’t ripple through your sight picture. Mount the screen with a VESA plate or arm — the 100×100 mm or 75×75 mm hole pattern set by the VESA standard fits most monitors and bolts straight onto a profile sub-plate.
Cable management is a rig decision, not an afterthought. Profile channels are made for it — route cables in the slots, cable-tie to the frame, and decide where the PC tower lives before you finish, because reaching the machine and the keyboard for the bits no panel covers yet is part of the ergonomics. Plan the tower into the frame from the start. The machine itself is covered in the flight sim PC build guide; where it physically sits is yours to design into the rig.
What to Skip on Your First Build
The fastest way to blow a first-rig budget is buying for the rig you’ll have in three years instead of the one you need now — so skip the panel mounts, the triple-monitor arms, and the keyboard trays until you’ve actually flown the basic frame. Profile is modular precisely so you can add those later from the same parts family; pre-building for hardware you don’t own yet just means brackets in the wrong place when the real gear arrives.
Specifically, on a first build I’d skip the powder-coated “looks like a real cockpit” extrusion in favour of plain mill-finish — it’s cheaper, it bolts up identically, and nobody flying it can tell. Skip the dedicated keyboard arm until you know which keys your panels haven’t replaced yet. Skip the second and third monitor uprights until you’ve decided between triples and head tracking, because that choice changes the whole monitor section — and for most people head tracking wins, as I argue in the head tracking value guide. And skip the urge to wire in lighting and accessories before the frame even flies; that’s the procrastination trap wearing a tool belt.
What you should not skip is bracing and spare t-nuts. Those are the parts that make the rig solid now and extensible later, and they’re cheap. Every krona saved by under-bracing gets spent twice when you rebuild the joint that twisted. Build the modest frame properly, fly it, and let the rig tell you what it actually needs before you spend another krona on it.
The Parts Checklist
If you’re ordering for a first build, this is the shopping list in plain terms — adjust quantities to your measured spec, and round brackets and t-nuts up, never down:
- Extrusion — 2040 for most members, 4040 for seat rails and monitor uprights, all cut to your measured lengths.
- Gusset brackets — one at every structural joint; these are your stiffness, don’t skimp.
- Angle brackets — for the lighter, non-structural joins.
- Drop-in t-nuts and bolts — a generous bag; mostly drop-in so you can extend later.
- Backing plates — small steel or ply plates behind the yoke and pedal mounts.
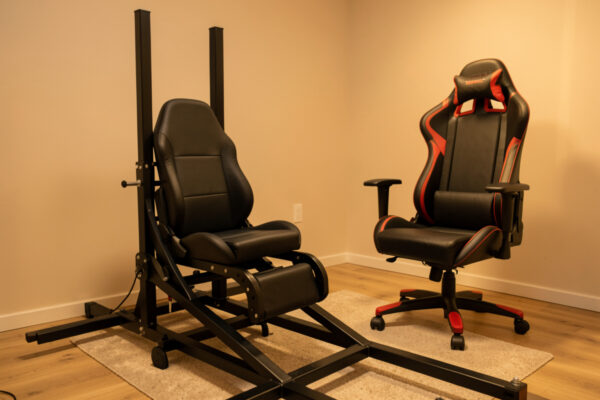
- A seat — chosen and positioned before anything else (see the chair vs cockpit seat guide).
- Tools — hex keys or a driver bit for your bolt size, a tape measure, a builder’s square, and a rubber mallet.
That’s a complete first rig. Build the partial version first if the budget’s tight — a pedal-and-controller deck parked in front of your existing chair solves most of the desk’s problems and the extrusion carries straight into the full build later. The whole staged path, and where this build sits in it, is laid out in the desk-to-rig migration guide, and the money side is broken down honestly in the rig upgrade cost guide.