A flight sim rig migration is the move from a controller clamped to your desk to a dedicated frame built around the seat, and the single biggest gain isn’t realism — it’s repeatability. On my deck, the yoke now sits in the same spot to the millimetre every session, and that consistency did more for my landings than any controller upgrade I have bought.
That is the honest headline of this whole guide. The desk phase is where almost everyone starts, and it should be — you do not need a rig to learn to fly a circuit. But there is a point where the desk stops being the cheap option and starts being the thing fighting you: the yoke clamp creeps under load, the pedals wander on the floor, your monitor is six inches too high, and you spend the first ten minutes of every session re-setting hardware instead of flying. Migrating to a rig is how you stop paying that tax. This is the path I walked, the order I would walk it in again, and the parts of it that are worth real money versus the parts the marketing oversells.
Why You Outgrow the Desk (and How to Know You Have)
You have outgrown the desk when re-positioning hardware has become part of your pre-flight, not a one-time setup. That is the test. A desk mount is brilliant for a single controller you leave clamped permanently; it falls apart the moment you are running a yoke, a throttle quadrant, and pedals that all want a fixed relationship to your hands and feet.
The specific failures show up in a predictable order. First the yoke clamp flexes — not enough to see, but enough that pulling hard in a stall recovery moves the whole unit a few millimetres and your sight picture twitches. Then the pedals start migrating across the floor, because there is nothing for them to brace against except friction, and a hard rudder input in a crosswind just slides them away from you. Then the throttle ends up wherever there is desk space, which is rarely where your hand naturally falls. None of these are dealbreakers individually. Together they mean your control inputs are landing on hardware that is in a slightly different place every time, and your muscle memory never gets to settle. The whole argument for a rig is that it makes the hardware boring — fixed, braced, and identical session to session.
If you are still deciding whether you have hit that wall, the cheaper diagnostic is to fix the desk first. A good clamp and bracing the pedals against a wall or a loaded box buys you months. I cover the geometry of making controllers work under a desk in the rudder pedals under a desk geometry guide, and it is genuinely the first thing to try before spending on a frame.
The Migration Path in Four Stages
Most simmers migrate in four stages, and skipping straight to stage four is the most expensive mistake in the hobby. The stages are: braced desk, partial frame, full profile rig, and enclosed cockpit. Each one solves a specific problem the previous one couldn’t, and each one costs roughly two to three times the last.
Stage one, the braced desk, is everything mounted to a sturdy desk with the pedals physically braced so they cannot slide. Cost is near zero if you already have the desk. This is where you learn whether you even want a rig.
Stage two, the partial frame, is a small dedicated structure — often just a pedal box and a wheel-deck style front section — bolted together from aluminium profile, parked in front of your existing chair. This is the stage that surprises people: it solves eighty percent of the desk’s problems for maybe a quarter of a full rig’s cost, because it fixes the pedals and the primary controller without building an entire seat structure.
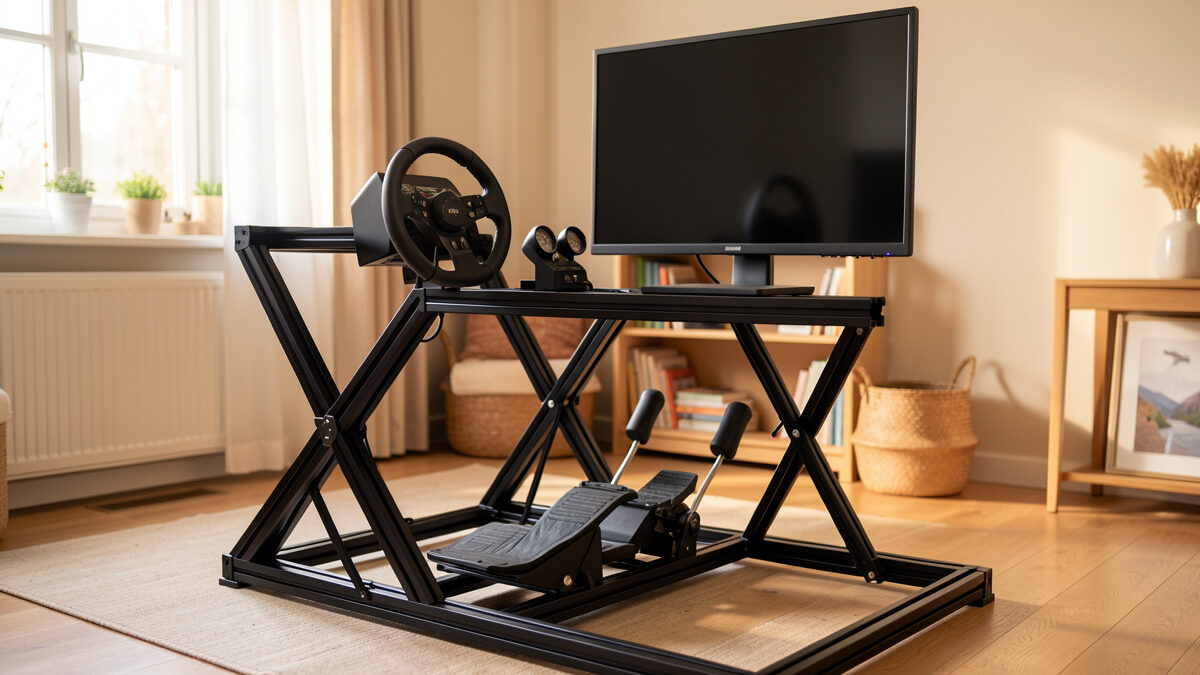
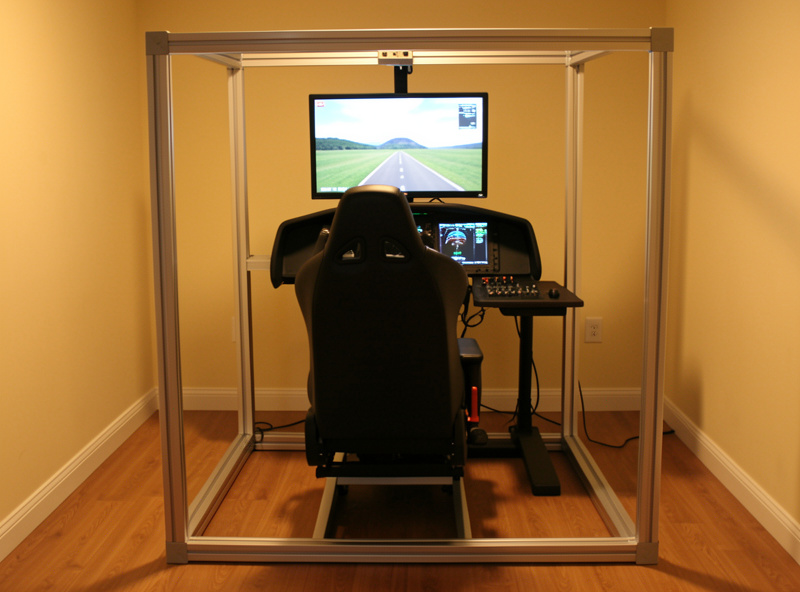
Stage three, the full profile rig, is a complete aluminium-extrusion frame carrying seat, pedals, yoke or stick, throttle, and monitor mounts as one rigid unit. This is the stage I run now, and for most people it is the end of the road — it does everything an enclosed cockpit does for immersion-per-krona, without the cost or the room it eats.
Stage four, the enclosed cockpit, is a replica shell — a study-level airframe with real panel positions. This is a different budget universe and a different hobby; replica-cockpit builders report total spends that dwarf everything below, and unless a specific airframe is your obsession, it is not where your money buys the most flying. I do not run one and I am honest about that.
The reason the order matters is sunk cost. Aluminium profile is modular — a partial frame becomes part of a full rig later, the same extrusions and brackets carry forward. Buy the partial frame, fly it for a season, and you will know exactly what your full rig needs instead of guessing. I lay the full reasoning out in the aluminum profile rig first-build guide, but the headline is: build small, build modular, extend later.
Reading a Rig Before You Build One
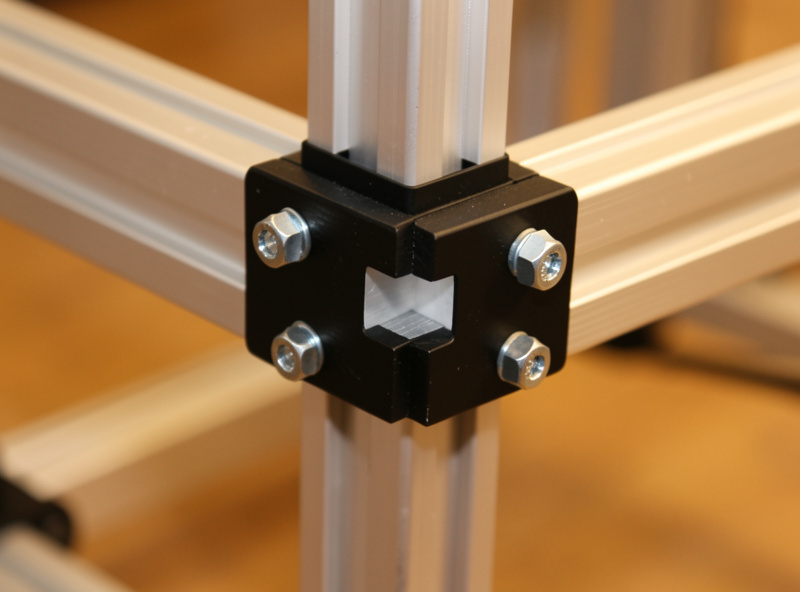
The thing that separates a rig that lasts from one you rebuild in a year is rigidity at the contact points, not the size of the frame. A rig can look enormous and still flex where it matters if the brackets are wrong. What you are actually buying with profile and gusset brackets is a frame that does not move when you do — and the places that move are the yoke mount, the pedal plate, and the monitor arm.
Rigidity comes from triangulation and from the bracket count, not from heavier extrusion alone. A 2020-profile frame with proper corner gussets and enough brackets will out-stiffen a 4040 frame held together with two bolts per joint. The extrusion size matters most for the longest unsupported spans — the seat rails and any monitor uprights carrying weight — and matters far less for short members. This is why I tell people to spend the bracket budget before the extrusion budget: a bag of gusset brackets is cheap and is the difference between a frame that twists and one that does not.
The second thing to read is adjustability. Your first build will have the seat, pedals, and monitor in the wrong place — everyone’s does. Profile rigs win because you loosen four bolts and slide a member; welded steel does not forgive a guess. Build in slots and t-nuts everywhere you might move something, and you will tune the ergonomics over the first month instead of living with day-one mistakes.
The Aluminium Profile Decision
For a flight sim rig, 2020 or 2040 extrusion handles everything except long monitor uprights, where 4040 earns its place. The instinct is to buy the heaviest profile available “to be safe,” but that is money spent on stiffness you cannot feel under flight-sim loads, which are gentle compared to a force-feedback racing wheel yanking at the frame. The load and deflection tables that extrusion makers like 8020 Inc publish bear this out — a braced 2040 span barely moves under the few kilos a yoke and throttle actually impose.
Here is the practical breakdown from my own build. The seat base and lower frame: 4040 if you want a floor you can stand on while climbing in, 2040 if weight and cost matter more. The yoke and throttle mounting members: 2040 is plenty, because a yoke’s loads are small and the member is short. The monitor uprights: 4040 if you are carrying a single large panel or triples on arms, because that is the longest unsupported span and the one that will visibly wobble if you under-build it. The pedal plate: 2040 with a solid backing plate, braced back to the seat frame so the rig absorbs your push instead of sliding.
Extrusion brands matter less than the connection ecosystem. Buy into a profile family with cheap, available t-nuts, gusset brackets, and angle connectors, because you will buy far more of those than extrusion over the life of the rig. A starter run of 2040 aluminium extrusion and bracket kits is where most first builds begin, and it is the part of the budget that carries forward into every future expansion. As an Amazon Associate I earn from qualifying purchases.

Mounts, Monitors, and Seating — the Three Hard Parts
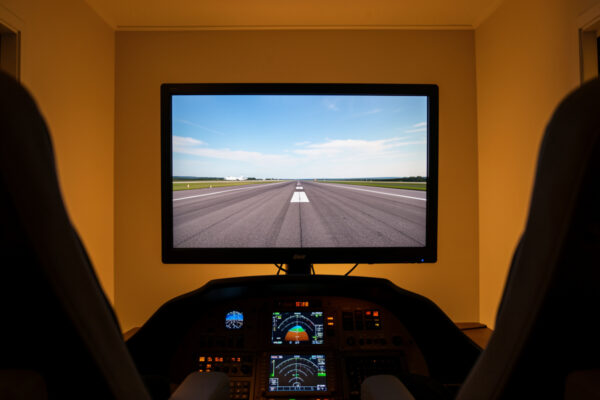
The three decisions that make or break a rig are how you mount the controllers, how high the screen sits, and what you sit in — and they are hard precisely because they interact. Get the seat height wrong and the correct monitor height changes; mount the yoke too high and your throttle hand cramps. You cannot solve them independently, which is why I build the seat position first and hang everything else off it.
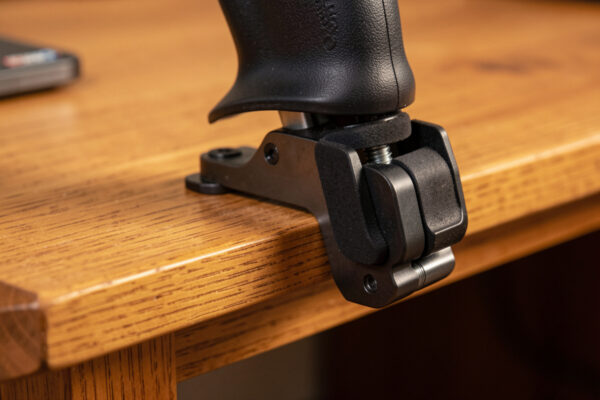
Mounts are the part people underestimate. A yoke that flexes on its mount feels exactly like a yoke that flexes on a desk — the rig did nothing for you. The fix is a short, well-braced member and a backing plate, not a longer arm. For monitors, the height question is its own rabbit hole because flight sim is unusual: your eyeline wants to sit near the horizon, which is higher than the desktop-monitor ergonomics most people copy. I dig into the exact numbers in the monitor mounting heights guide, and getting it right is the difference between an immersive sight picture and a stiff neck at hour two. Mount the panel itself with a VESA plate or arm — the 100×100 mm or 75×75 mm hole pattern set by the VESA standard bolts straight onto a profile sub-plate.
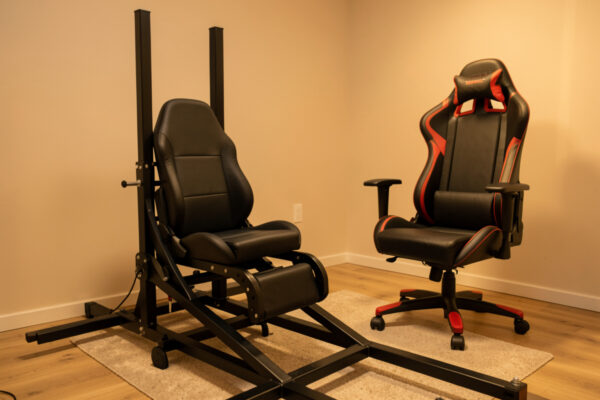
Seating is where the most money gets wasted on the wrong thing. A gaming chair, a salvaged car seat, and a purpose-built cockpit seat all “work,” but they fail differently over a long-haul. I went deep on the trade-offs in the flight sim chair vs cockpit seat guide, and the short version is that the seat’s job in a rig is to be a rigid, repeatable reference — which is the opposite of what a plush office chair is built to do. A rigid bucket-style cockpit seat mounted to the frame holds you in the same place every flight; a chair on casters does not.
What the Migration Actually Costs
A realistic full profile rig — frame, mounts, monitor support, and a proper seat — lands well under the cost of the controllers it carries for most builders, which is why the cost objection is usually backwards. People who already own a yoke, throttle, and pedals balk at the frame price while having spent three times that on the hardware that frame finally makes usable. The frame is the cheap part that unlocks everything you already bought.
The honest cost ladder runs from a near-free braced desk, to a modest partial frame, to a full rig that is a real but one-time spend, to an enclosed cockpit that is a different financial planet. I break the line items down properly — extrusion, brackets, fasteners, monitor support, seat, and the hidden costs nobody warns you about — in the rig upgrade cost reality guide. The summary table below is the shape of it; the detail guide is where the actual numbers live.
| Stage | What it is | Solves | Relative cost | Best for |
|---|---|---|---|---|
| Braced desk | Existing desk, pedals braced | Sliding pedals, basic stability | Near zero | Learning to fly; testing commitment |
| Partial frame | Small profile pedal/controller deck | Pedal bracing + primary controller flex | Low | Most simmers’ best value step |
| Full profile rig | Complete extrusion frame, seat to screen | Repeatability, monitor height, ergonomics | Moderate (one-time) | The realistic end of the road |
| Enclosed cockpit | Replica airframe shell | Single-airframe study immersion | High to very high | One-airframe obsessives only |
What Assembly Actually Takes
A first profile rig goes together in an afternoon with three tools, and the build is genuinely friendlier than flat-pack furniture because nothing is glued and every mistake is reversible. The reason aluminium profile dominates this hobby is that it assumes you will get it wrong the first time and lets you fix it without starting over — loosen, slide, re-tighten.
The tool list is short: a set of hex keys (or a single driver bit for the bolt size your bracket kit uses), a tape measure, and a square to keep joints at ninety degrees while you tighten. That is it for a basic frame. A cheap rubber mallet helps seat t-nuts and tap members into alignment, and a deburring tool matters only if you are cutting your own extrusion rather than buying it pre-cut to length — which, for a first build, you should not. Order cut-to-length and you skip the only genuinely fiddly step.
The one technique worth knowing before you start is the difference between drop-in and slide-in t-nuts. Slide-in nuts have to go in from the end of the extrusion before you cap it, so they must be planned; drop-in nuts can be added anywhere later, which is what makes a profile rig endlessly extensible. Buy mostly drop-in nuts for your first build — they cost a little more and they save the “I forgot to slide a nut in and now I have to disassemble the frame” evening that every builder lives through exactly once. Keep a small bag of spares in t-nuts and bolts; you will want to add a panel mount or a cup holder three weeks after you swore the rig was finished.
My Build Order, If I Did It Again
If I rebuilt from scratch tomorrow, I would build the pedal bracing first, the seat-and-frame core second, and the monitor support last — and I would not touch the enclosed-cockpit idea at all. That order front-loads the upgrades you feel immediately and back-loads the ones that are mostly about polish.
Pedals first because braced pedals are the single largest “the rig is working” moment — the first crosswind landing where the pedals do not slide is when the whole project justifies itself. This mirrors the controller upgrade order I argue for across the site: realism per krona, not spec-sheet completeness. If you have not read it, the flight sim hardware upgrade order is the doctrine the whole rig migration sits inside, and the case for rudder pedals before a better yoke is the same logic applied to controllers.
Seat-and-frame core second because once the pedals are fixed, the next felt gain is your body being in the same place every flight. Monitor support last because it is the most fiddly and the most personal, and you will tune it for weeks regardless — there is no point perfecting it before the seat position that determines it is locked in.
The thing I would explicitly not do is chase the enclosed cockpit. The best money-per-immersion upgrade in this hobby is not a bigger frame — it is head tracking, which I make the case for in the head tracking value guide. A modest rig plus head tracking out-immerses a huge rig with a fixed view, for a fraction of the cost and the room.
Mistakes I Made So You Don’t Have To
My most expensive rig mistake was building the frame before deciding the seat, which meant tearing down and rebuilding the whole front section once the seat height changed the geometry. The lesson is universal: the seat is the datum, everything references it, and changing it after the fact ripples through the whole rig. Decide the seat, then build.
The second mistake was under-bracing the monitor upright to save on a single piece of 4040. It wobbled on every keyboard bump and ruined the sight picture I had built the rig to get. The fix cost less than the original under-build and an evening of rework — pay for the long-span stiffness the first time.
The third was treating the rig as separate from the sim PC. Cable management, where the tower lives, how you reach the keyboard for the bits no panel covers yet — these are rig decisions, not afterthoughts. Plan the PC into the frame from the start; the flight sim PC build guide covers the machine itself, but where it physically lives is a rig question. And do not let the build become the hobby — the upgrade procrastination trap is real, and a finished modest rig you fly beats a perfect rig you are still planning.
Every lesson in this deck was paid for on a racing rig first — aluminium profiles, monitor throw, and the soldering iron do not care which sim runs. The flight deck just swapped lap times for landings. If your budget is the real constraint, the honest comparison of what $200 versus $600 actually buys applies to the rig as much as the controllers, and a budget sim PC build pairs with a partial frame for a complete, modest deck that flies beautifully.
Frequently Asked Questions
Do I need a flight sim rig to fly well, or can I stay on a desk?
You can learn to fly a full circuit on a braced desk; a rig is not required for skill. A rig wins on repeatability, not raw realism. Migrate when re-positioning hardware has become part of your pre-flight rather than a one-time setup.
What aluminium profile size should a first flight sim rig use?
2020 or 2040 extrusion handles a flight sim rig everywhere except long monitor uprights, where 4040 earns its place. Flight sim loads are gentle, so spend your budget on gusset brackets and triangulation rather than heavier profile.
What is the most cost-effective stage of a rig migration?
The partial frame. A small profile deck that braces the pedals and the primary controller solves roughly eighty percent of a desk’s problems for about a quarter of a full rig’s cost, and the extrusion carries forward into a full build later.
Is an enclosed replica cockpit worth it over a profile rig?
For most simmers, no. A modest profile rig plus head tracking delivers more immersion per krona than a large enclosed cockpit with a fixed view. Enclosed cockpits make sense only when one specific airframe is the whole point of your hobby.
What should I build first when migrating from desk to rig?
Brace the pedals first, build the seat-and-frame core second, and add the monitor support last. The seat is the datum that every other position references, so lock it in before building anything that depends on its height.
Will a flight sim rig fix a flexing yoke?
Only if you mount the yoke on a short, well-braced member with a backing plate. A long unsupported arm on a rig flexes exactly like a desk clamp. Rigidity comes from bracing at the contact point, not from the size of the frame around it.