Here is the thing nobody selling flight sim hardware wants to tell you: the order you buy in matters more than the brands you buy. I learned that the expensive way, building my home deck up over years from a desk-clamped yoke to a dedicated rig frame, and the single biggest realism jumps almost never came from the most expensive box. They came from buying the right thing at the right time. This is my upgrade-order doctrine — the sequence where each krona buys the most realism — and it is the spine that every other gear article on this site hangs from.
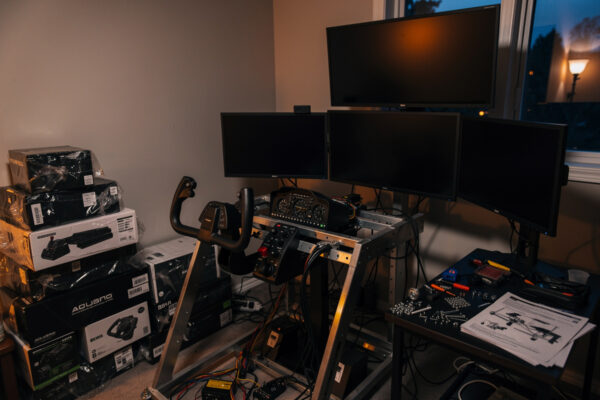
I run two yokes, a HOTAS, load-cell-class rudder pedals, a Bravo-class throttle quadrant, button boxes I wired on my own bench, an IR head tracker, and a VR headset, all on a self-built aluminum-profile frame in front of MSFS 2024 and X-Plane 12. I did not buy them in a smart order. I am writing this so you can.
The core idea: buy immersion-per-krona, not features-per-krona
A spec sheet sells you features. A flight deck rewards immersion — the moment the hardware stops being something you operate and becomes something you fly through. Those are not the same purchase. The most feature-dense box on the shelf can sit there adding almost nothing to how a session feels, while a cheap clip on your headset rewires how you fly within a week.
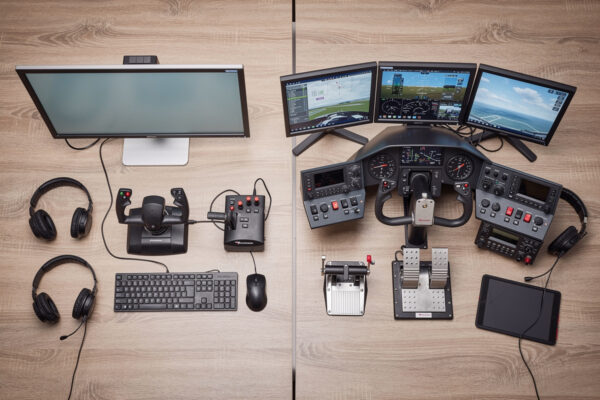
So the doctrine ranks every upgrade by one question: per krona spent, how much closer does this get me to flying instead of operating? Run that test and the conventional shopping list inverts. The order I argue for is roughly: get any primary controller off the keyboard, then rudder pedals, then head tracking, then a throttle quadrant, then panels and button boxes, then the rig frame and the PC where each genuinely bottlenecks you. The rest of this guide walks each rung, and links to the deep-dive on every decision so you can argue with me at the detail level.
Rung 0: get off the keyboard (your first real purchase)
If you are flying with the keyboard and mouse, your first purchase is not about which yoke or stick is best — it is simply about getting an analog primary controller under your hand. Keyboard pitch and roll are binary: full deflection or nothing, no in-between, no feel. The first time you fly the same approach with an analog axis you stop fighting the aircraft and start flying it. That step is so foundational I gave it its own deep-dive on what to buy first after the keyboard, because getting it wrong here sours people on the whole hobby.
The honest truth is that almost any entry analog controller beats the keyboard by a margin nothing else in this list matches. The Logitech G-class yoke I started on — the one I know down to its detents — is not a premium device, and it still transformed every flight over the keyboard setup it replaced. Do not over-think rung 0. Buy analog, fly, and learn what you specifically want next.
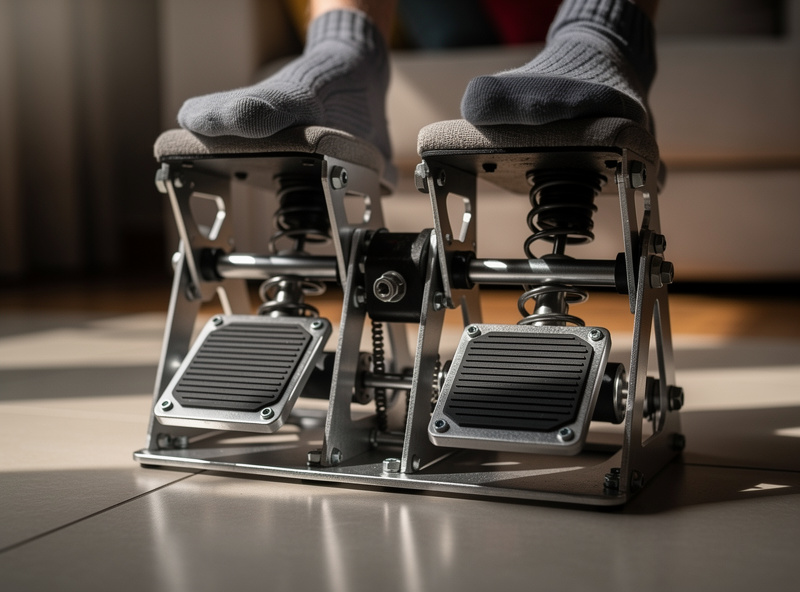
Rung 1: rudder pedals (yes, before a better yoke)
This is the rung I am most often told I am wrong about, and the one I am most sure of. After you have an analog primary controller, the next purchase that buys the most realism is rudder pedals — not a fancier yoke, not a second monitor, not a throttle quadrant. Pedals.
Here is why. Without pedals, yaw is either automated (the sim coordinates your turns for you) or mapped to a twist grip or keys, and either way you are not flying the aeroplane in the third axis. The moment you put your feet on pedals, three things you could not do properly before become possible: coordinated turns you actually feel, crosswind landings flown with rudder instead of luck, and taxiing that is not a comedy. My own crosswind landings did not get good until the pedals went in, full stop. I make the felt-experience case in detail in rudder pedals before a better yoke, including why I would take entry pedals over a premium yoke every time for a new simmer.
The upgrade from my entry spring pedals to a load-cell-class set was real but secondary — it refined a feel I already had. Going from no pedals to any pedals is the realism cliff. Going from cheap pedals to expensive pedals is a gentle slope.
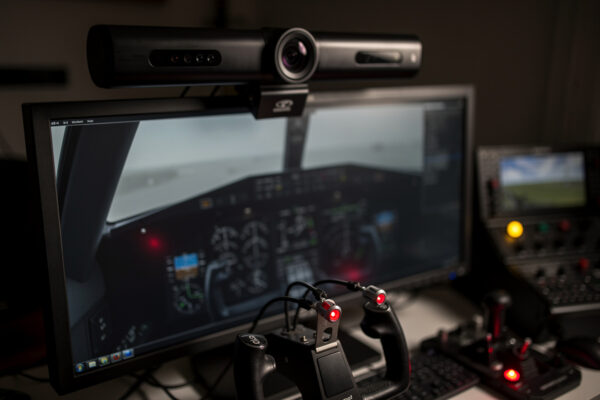
Rung 2: head tracking (the best-value upgrade in the hobby)
If pedals are the rung people get wrong, head tracking is the rung people get to too late. For the price of a midrange controller, an IR head tracker gives you six-degrees-of-freedom view control: lean to look around the pillar on a base leg, glance at the panel without a hat switch, look into the turn. It is the single best money-per-immersion upgrade I have made on the deck, and I have made all of them.
The reason it ranks so high is that it fixes a problem you did not know you had: a fixed forward view is the least realistic thing about a flat-screen sim, and head tracking dissolves it without the cost, the motion-sickness adaptation, or the GPU bill of VR. I own the VR headset too, and I still reach for head tracking on most flights. I lay out the full trade-off — head tracking versus VR versus triple screens — in why head tracking is the best-value upgrade. If you only read one spoke off this hub, make it that one.
The yoke-versus-stick fork (which primary controller is yours)
Rung 0 said “buy an analog primary controller.” It did not say which kind, because that genuinely depends on what you fly. This is the one place in the doctrine where the order branches, and getting the branch right saves you from buying twice.
Broadly: a yoke suits general-aviation and airliner flying — the Cessnas, the Barons, the tubeliners — because that is the control those aircraft actually use. A stick (and a HOTAS, stick plus throttle) suits military jets, aerobatic types, and anyone who knows they want fast-jet immersion. Helicopters are their own conversation with a collective. I own both sides and fly both, and the verdict is not “one is better” — it is “match the hardware to the aircraft you will actually spend hours in.” I work through the whole decision, including the cost of switching later, in HOTAS vs yoke as your first purchase. Choose this before rung 0, then buy the entry version of the side you chose.
Rung 3 and beyond: throttle quadrants, panels, button boxes
Once the primary controller, pedals, and head tracking are in, you have the realism foundation. Everything after this is about moving the keyboard out of the loop and adding the tactile controls that match the aircraft you fly most.
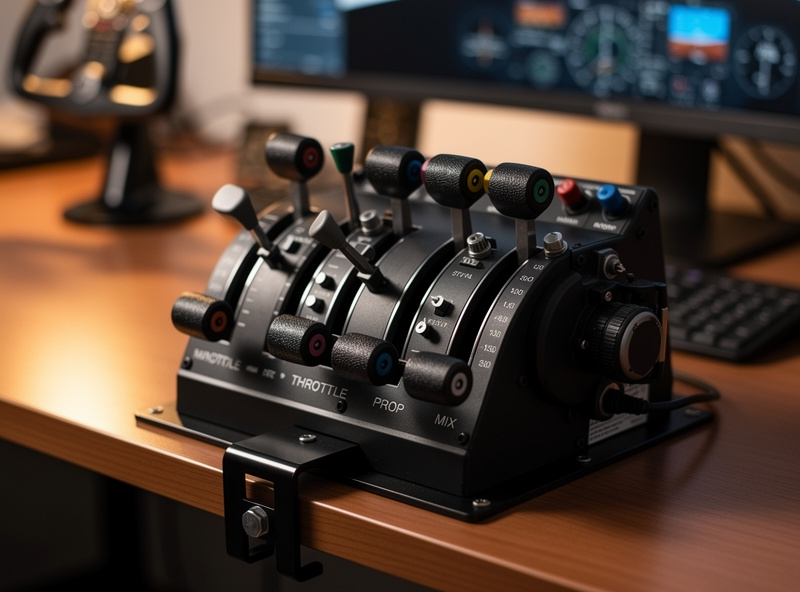
A throttle quadrant is the next genuine realism step for anyone flying twins or airliners: separate levers, reverse-thrust detents, and a flap and gear placement your hand learns. The first time you pull two levers into reverse on a wet runway instead of tapping a key, the landing stops being a button press and becomes a thing you do. For single-engine GA flying the case is softer — one throttle axis on a yoke covers a lot — which is exactly why the quadrant sits at rung three and not rung one. It is a realism step that depends on what you fly.
After that come the panels — autopilot, radio, the switch banks — and the button boxes, which is where my workshop background pays off. I build and wire my own button boxes on the bench, flash the firmware myself, and label them so the labels still mean something a year later. The lessons there are unglamorous and real: a matrix wiring scheme so a handful of pins reads dozens of switches, a controller board that the sim sees as a plain joystick, and labeling that survives a year of fingers because I learned the hard way what does not. That is content the unboxing channels structurally cannot make, and it is the rung where the hobby quietly turns from buying into building. None of it, though, belongs before pedals and head tracking. A beautifully wired radio panel in front of a keyboard-flown approach is a backwards deck. Buy the foundation first, then build outward.
The upgrade order at a glance
Here is the doctrine as a table — every rung ranked by immersion-per-krona, the rough spend tier, and what it actually fixes. This is the order I would build a deck in if I were starting over today, and the order I would tell a friend to follow.
| Order | Upgrade | Rough spend tier | What it actually fixes | Immersion-per-krona |
|---|---|---|---|---|
| 0 | Any analog primary controller (yoke or stick) | Entry | Binary keyboard control → real feel | Highest |
| 1 | Rudder pedals | Entry–mid | Coordinated turns, crosswinds, taxi | Very high |
| 2 | Head tracking (IR) | Mid | Fixed forward view → six-degrees-of-freedom | Very high |
| 3 | Throttle quadrant | Mid | Twin/airliner power, reverse detents | High (type-dependent) |
| 4 | Panels & button boxes | Mid–high | Keyboard out of the loop, tactile systems | Medium–high |
| 5 | Better yoke / load-cell pedals | High | Refines feel you already have | Medium (diminishing) |
| 6 | Rig frame & PC upgrades | High | Ergonomics, frame-time headroom | Situational |
Notice how far down “better yoke” sits. That is the whole argument in one row: the premium version of a thing you already own is almost always a worse buy than the entry version of a thing you do not. Spend across the rungs, not up a single one.
Where the PC and the rig frame fit in the order
Two big-ticket items sit deliberately near the bottom of the doctrine, and people argue with me about both: the PC and the rig frame. The reason they rank low is not that they do not matter — it is that they are situational, and buying them early is how you end up with a powerful computer driving a keyboard.
The sim PC earns an upgrade only when frame-time tells you it is the bottleneck. I judge this from logged frame-times in MSFS 2024 and X-Plane 12 at the resolutions I actually fly, not from synthetic benchmarks and not from frames-per-second averages that hide the stutters. A smooth flight is about consistent frame-time, the gap between one frame and the next, and that is what you feel on a turning final more than any headline number. If your frame-times are steady at the settings you fly, a faster GPU buys you nothing your hands can detect, and that money belongs on a rung higher up the list. When the sim genuinely hitches and the logs show it, then — and only then — the PC moves up your personal order.
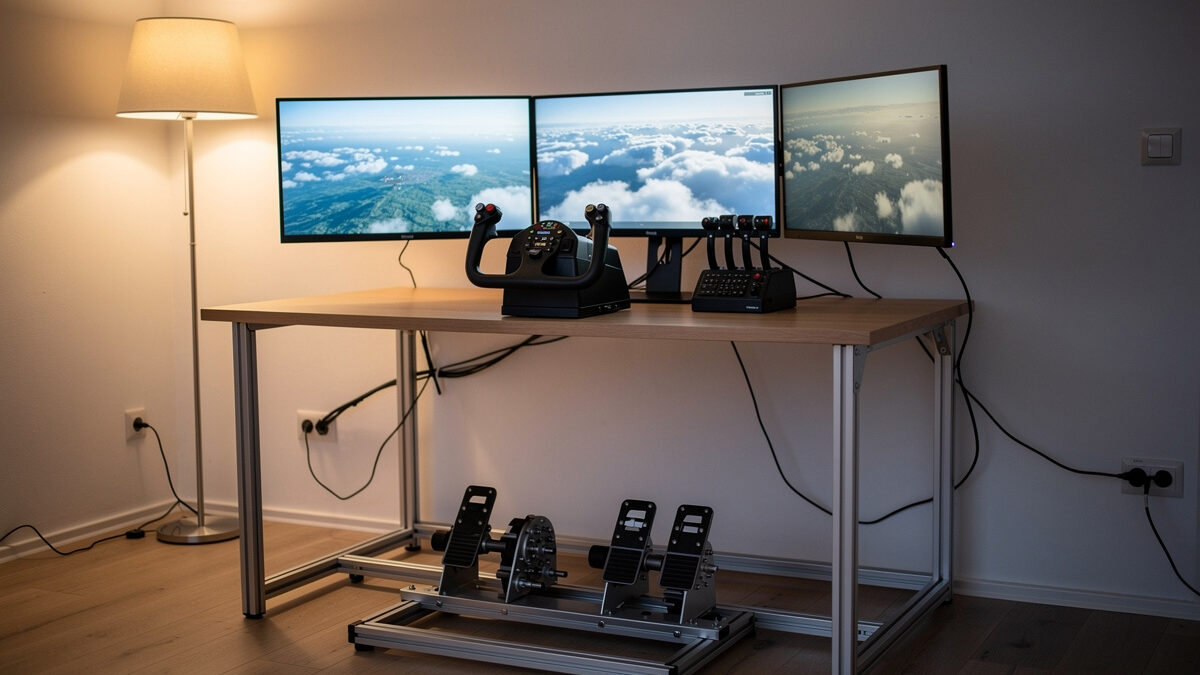
The rig frame is the same story from the ergonomics side. I started, honestly, on a desk-mount — yoke clamped to the desk edge, pedals sliding on the floor, the whole thing flexing when I pulled hard on a go-around. It worked, and it taught me what I actually wanted before I spent on aluminum profile. The dedicated frame I eventually built fixed the flex and, more importantly, fixed the geometry: pedals at a fixed distance, yoke at a height my arms hold for hours, a seat that does not turn a long-haul into a back complaint. That matters enormously at hour three — but it matters not at all in week one, when you should be spending on the controllers that change how you fly rather than the frame that holds them. Build the frame when the desk-mount’s limits are the thing annoying you, not before.
This is the discipline the whole doctrine is built to enforce: let the deck tell you what it needs next instead of letting the marketing tell you. Frame-time logs name the PC moment. Aching arms name the frame moment. A view you keep wishing you could lean past names head tracking. Listen to the deck, and the order more or less writes itself.
What $200 versus $600 actually buys you
The doctrine is also a budgeting tool. Two hundred kronor-equivalent buys you off the keyboard and onto pedals if you shop the entry tier — rungs 0 and 1, the two biggest realism cliffs, for the price of one midrange controller. Six hundred gets you the foundation plus head tracking and a throttle quadrant, which is a startlingly complete deck. The mistake is spending the whole six hundred on one premium controller and skipping the rungs that actually move immersion. I break the two budgets down purchase by purchase in what a $200 vs $600 flight sim budget buys, because the right answer at each tier is not obvious and the wrong answer is expensive.
The trap that ruins the whole order: buying instead of flying
I have to end on the failure mode, because it is the one that catches the most people, and it caught me. At some point in this hobby, researching and buying hardware quietly becomes the hobby — you have a flyable deck, and instead of flying it you are three browser tabs deep comparing the next box. That is procrastination dressed as preparation, and no upgrade fixes it because it is not a hardware problem.
The doctrine has a built-in defense: because the order is fixed and immersion-ranked, you always know exactly what your next purchase should be, which kills the endless comparison loop. Buy the next rung, then fly until you can name the specific thing the deck is missing. If you cannot name it, you do not need it yet. I wrote the hardest, most honest piece in this whole cluster about that — the flight sim upgrade procrastination trap — because the best upgrade most simmers can make is to stop upgrading and go fly the deck they already built.
How to use this cluster
Treat this hub as the map and the spokes as the terrain. If you are brand new, start with first hardware after the keyboard and the HOTAS vs yoke fork. If you already have a primary controller, your next read is rudder pedals before a better yoke and then head tracking. If you are budgeting a build, go straight to the $200 vs $600 breakdown. And if you already own more hardware than you fly, read the procrastination trap first — it is the one that gives you your hours back.
Every one of these is built from the same bench: gear I own, wired, compared, and flew, judged by what it does to your hands at hour three of a long-haul on a Swedish winter night when the real weather has grounded everything. That is the only test that matters, and it is the one the spec sheets never run.
Frequently Asked Questions
What order should I buy flight sim hardware in?
Buy an analog primary controller (yoke or stick) first to get off the keyboard, then rudder pedals, then head tracking, then a throttle quadrant, then panels and button boxes. Rank every upgrade by immersion-per-krona rather than features-per-krona, and the entry version of a thing you do not own almost always beats the premium version of a thing you already have.
Are rudder pedals really worth buying before a better yoke?
Yes. Going from no pedals to any pedals is a realism cliff: it unlocks coordinated turns, crosswind landings flown with rudder, and proper taxiing. Going from a cheap yoke to an expensive yoke is a gentle slope by comparison. For a new simmer I would take entry pedals over a premium yoke every time.
Is head tracking worth it compared to VR?
For most simmers, yes. An IR head tracker gives six-degrees-of-freedom view control for roughly the price of a midrange controller, with none of VR’s cost, GPU demand, or motion-sickness adaptation. I own a VR headset too and still reach for head tracking on most flights.
Should my first controller be a yoke or a stick?
Match it to what you fly. A yoke suits general aviation and airliners; a stick or HOTAS suits military jets and aerobatic flying. Decide this before your first purchase so you buy the entry version of the right side rather than buying twice.
What can I get for a $200 flight sim budget?
Around $200 buys the two biggest realism cliffs if you shop the entry tier: getting off the keyboard onto an analog controller, plus rudder pedals. The mistake is spending the same money on one premium controller and skipping pedals and head tracking entirely.
Will this hardware make me a better real-world pilot?
This is desktop flight-sim hardware for home use, judged purely on immersion and how it feels to fly the sim. Nothing here is real-world flight training, and real-world pilots and instructors are the people to ask about actual transfer to flying an aircraft.
Related Guides
- First Flight Sim Hardware After the Keyboard
- Rudder Pedals Before a Better Yoke
- Head Tracking: The Best-Value Upgrade
- HOTAS vs Yoke: Your First Purchase
- What $200 vs $600 Actually Buys
- The Upgrade Procrastination Trap
Related Guides on the Deck — Complete Spoke List
Full spoke list of the Upgrade Order cluster:
- “The Flight Sim Upgrade Procrastination Trap: When Buying Gear Becomes the Hobby”
- “Flight Sim Hardware Budget: What $200 vs $600 Actually Buys You”
- “Head Tracking: The Best-Value Flight Sim Upgrade Nobody Talks About First”
- “HOTAS vs Yoke: Which Should Be Your First Flight Sim Purchase?”
- “First Flight Sim Hardware After the Keyboard: What to Buy Before Anything Else”
- “Rudder Pedals Before a Better Yoke: The Upgrade Most Simmers Get Backwards”
More From This Site
Other guides across upgrade order and the rest of the Flightdecksource library:
- “The Budget Flight Sim PC Build That Actually Works”
- “VR Flight Sim PC Requirements: The Jump Nobody Warns You About”
- “32GB vs 64GB RAM for Flight Sim: The Honest Answer”
- “CPU vs GPU Bound in Flight Sim: Why Your Stutter Isn’t the Card”
- “The Best GPU for 1440p Flight Sim: VRAM Is the Real Decider”
- “MSFS 2024 System Requirements: The Real Numbers vs the Spec Sheet”
- “The Flight Sim PC Build Guide: What MSFS 2024 Actually Needs”
- “The Real Cost of Switching Yoke to Stick Later”
- “Curves and Deadzones: Making Any Flight Sim Controller Disappear”
- “The Helicopter Question: Why a Stick Is Only Part of the Answer”
- “Airliner Control Logic: Why the Airbus Uses a Sidestick”
- “Why GA Aircraft Want a Yoke: The Control-Column Argument”
- “Yoke or Stick for MSFS 2024: The Most Common Wrong Purchase”
- “Yoke vs Stick for Flight Sim: Which to Buy for the Aircraft You Actually Fly”
- “The Flight Sim Upgrade Procrastination Trap: When Buying Gear Becomes the Hobby”
- “Flight Sim Hardware Budget: What $200 vs $600 Actually Buys You”
- “Head Tracking: The Best-Value Flight Sim Upgrade Nobody Talks About First”
- “HOTAS vs Yoke: Which Should Be Your First Flight Sim Purchase?”
- “First Flight Sim Hardware After the Keyboard: What to Buy Before Anything Else”
- “Rudder Pedals Before a Better Yoke: The Upgrade Most Simmers Get Backwards”